Showing posts with label Beauty. Show all posts

Saturday, 11 November 2017

The Only 4 Natural Remedies You Need To Grow Back Receding Gums

November 11, 2017 0 Comments
There are a lot of reasons why gums recede and it can become quite a health problem if this happens. If you are experiencing receding gums then you have found a great article to read. In this article you will find 4 of the best home natural remedies to help grow back your receding gums. Your gums are not something you should ignore, especially if you are noticing some problems like receding.

Here are some of the remedies on how to grow back receding gums. 


he situation of receding gums happens when the tissue of the gum around the teeth corrodes and it looks like your gums recede backwards. Then a large surface of the teeth is exposed and more visible. When the gums go back, the space between the gum line and the teeth rises. That is perfect place for bacteria growth. Another problem that may happen is over exposure of the root of the tooth that can lead to extreme pain and sensitivity of the tooth. It will also have a negative influence over the structure and bone of the tooth that can cause losing of the tooth. receding-gums

Symptoms


This is a very common problem and most of the people who suffer from it do not notice the problem. The reason is because the process is slow and happens gradually. Remember to check your gums if you teeth have become very sensitive. That is one of the first signs. Another indicator is the size of you tooth: if it is larger than before then you need to treat the problem because it is a sign of receding gums. Other symptoms may be:

Tooth pain/ache
– Larger tooth than before
– Tooth sensitivity

What causes receding gums?!


It might be a gum disease, but it can be caused by other reasons such as:

1. Periodontal diseases. That means bacterial infection in the gums. They cause damage to the supporting bone of the tooth and the gums, followed by other problems.

2. Lack of oral hygiene. If you skip teeth brushing and flossing you might build up plague on the teeth. That can lead to calculus which is a hard substance which can lead to gum recession.

3. Aggressive brushing. It is the complete opposite of brushing teeth on regular basis. If you brush your teeth aggressively then the enamel on your teeth will be destroyed and this will lead to receding gums.

4. Sometimes you will blame the genes. In this case you cannot change a lot about your problem.

Homemade recipes for growing back receding gums


We present you homemade recipes that require only simple ingredients such as herbs and spices.

1-  Green tea


Green tea has an abundance of health benefits. It is full of antioxidants that fight the free radicals that can cause periodontal disease which can lead to receding gums. One of the antioxidants in green tea is catechins and it helps in destroying any periodontal disease. This antioxidant can strengthen the connection between the gums and teeth. Its anti-inflammatory properties will lower the swelling of the gums that cause oral diseases.

How to use it:


Every morning drink 1 cup of green tea.

2- Aloe Vera


We present you another ingredient that can help you with your gum problem. It is aloe vera and it has many health benefits and most of them are connected with skin problems. The reason is because aloe vera has many anti-inflammatory properties and repairing capabilities. In cases of receding gums, aloe vera will fight against inflammation and will turn on the cells which are very important for repairing of the tissues. It will prevent other infections, due to its antibacterial properties.

How to use it:


Use the gel from aloe vera for your gums problem. There are 2 ways. The first one is to use aloe vera gel like a mouthwash and for brushing.

Once you have flossed and brushed, put some aloe vera gel and once again brush the gums and teeth. This should last around 3 to 5 minutes. Then rinse your mouth thoroughly.

The other way is to use it as a mouthwash. Once again after you brush your teeth take a little bit of aloe vera gel and dissolve it in some water. The consistency should be good enough for you so you can swirl it through your mouth. Do this every day after brushing.

3- Oil pulling


One of the most effective treatments for receding gums is oil pulling. It also helps with other oral diseases and it is mostly known for healing cavities. Sesame oil has many health benefits and anti-inflammatory properties. It can reduce plague buildups and destroy the toxins in your mouth. The sesame oil will form a protective layer over your teeth and it will reduce the chances of plague building. You can also use this method for improving the absorption of healthy nutrients in your body.

How to use it:


Take sesame oil and warm it up. Do not overheat the oil. You only need to warm it. Then brush your teeth and take sesame oil in your mouth. Gargle it and swirl it around your mouth. Do this for a few minutes. If you are not familiar with this process you can start with 30 seconds to 1 minute and once you get used to the procedure increase the time. The goal is 15 to 20 minutes.

4- Lemon


Lemons are known for their antiseptic and antibacterial properties. The lemon can stimulate the growth of receding gums. It will also destroy the bad breath.

Lemons are acidic and remember that too much of them can destroy the enamel on your teeth. Do not use lemon oil every day. It should be used only one time in week. If you want you can make homemade lemon oil and you will not have to worry about that.

Homemade lemon oil:


You will need:


– ¼ to ½ cup of olive oil
– ½ to 1 freshly squeezed lemon juice


Directions: put the olive oil in a jar and add the lemon juice. Cover and shake it well. Leave the mixture for a couple of weeks. Remember to shake the jar every day. After three to four weeks you can start and use the oil.

How to use it:


Apply little bit of lemon oil on your fingers and massage your gums for a couple of minutes. Do this method not more than 2 times in a week.

Tips for preventing gum recession


It is better to prevent the problem then to cure it. If you see how many people have problems with receding gums then it is time to take some precautions. This way you will prevent other oral diseases as well. We will give you some tips that can help you to take better care of your gums and mouth.

Friday, 10 November 2017

Home Remedies for Swelling Feet

November 10, 2017 0 Comments
Swelling feet is a common problem that anybody can face. Sometimes it may accompany with pain and can affect your normal routines. So to get relief from foot pain and swelling feet this article has focused on the causes and home remedies for swelling feet.


Causes of Swelling Feet


There are few causes of swelling and pain in the feet, arthritis is most common cause for swelling feet. The common symptom of arthritis is joint inflammation.


Swelling in joints, stiffness in joints, restricted mobility in joints and redness are the reason for arthritis. Frostbite is another cause of swelling feet. Swelling of the hands and feet or other areas of the body can occur due to abnormal kidney function, kidney diseases, congestive heart failure, protein deficiency, cancer, or sodium retention. Pregnancy, standing for prolonged periods of time, premenstrual syndrome, an injury, oral contraceptives, low thyroid, anemia and deficiencies of potassium and vitamin B, or allergic reactions are the other reasons for swelling feet.


Swelling foot is really annoying, painful and even prevents you from doing your daily tasks. It is recommended to get a proper medical check-up because swelling foot can be a symptom of various serious medical conditions like arthritis and nerve circulatory problem.


Home Remedies for Swelling Feet


There are several home treatments that are very helpful to get you relief from swelling of the feet. Few of them are discussed as below -


  • Hot and cold water massage gives tremendous relief from swelling. It is one of the best home remedies for swelling feet.

  • Water has therapeutic benefits for swelling feet. It helps in relieving the pain and swelling from your feet without any fear of side effects.

  • Soaking your feet in lukewarm water followed by a gentle massage using cream or lotion is very helpful relief for foot pain or swelling feet.

  • Stretching and foot exercise is very effective home remedies for swelling feet. There are some good foot exercises and stretching that you can do as a relief for foot pain.

  • Avoid high heels and don't put a lot of pressure on your feet.

  • Wear shoes that fit properly – size, shape and comfort are very important factor in selecting shoe.

  • Apply mixture of lemon juice, cinnamon, olive oil, water and milk.

  • Apply mixture of peppermint essential oil, water, eucalyptus essential oil and lemon essential oil. It is an effective home remedies for swelling feet and can be done anytime as all the ingredients are available at home all the time.

  • Baking powder, rice water with water – Rice water is very good for improving micro circulation.

  • A tea tree oil foot soak can also give you relief from foot pain and swelling of the feet.

  • Lavender bubble baths and foot massage –It has a wonderful ingredient for your feet.

  • Sandalwood oil massage – It has a soothing effect.

  • Disclaimer: This article is not meant to provide health advice and is for general information only. Always seek the insights of a qualified health professional before embarking on any health program.

Get Rid Of Pimples Overnight

November 10, 2017 0 Comments


Pimples may spoil your days and leave behind aesthetically unpleasant scars. It is natural that you  will want  to get rid of them as early as possible especially if you are going to attend  a date or a party where you might meet a lot of people.Some of the tips that are listed out here may help in removing pimples for you overnight. These simple remedies can be followed at your home.


Toothpaste


This is a very popular remedy to get rid of pimples overnight. Apply toothpaste before going to bed. Do not use gel for this. At night, wake up for a few times and check whether toothpaste covering is still there. If it is not, re-apply toothpaste on the acne. You will find a significant improvement in the morning.


Steam


Take a container and fill it with water. Boil the water for a few minutes and later keep the container below your face. Let the steam moisturize your face for 2–3 minutes and then rinse your face with  water. This helps in removing dirt, dust and oil from the pores of the skin without aggravating pimples. Application of an oil free moisturizing lotion helps to restore the lost moisture. This remedy aids in getting rid of pimples.


Lemon juice


Another simple remedy to get rid of pimples is application of lemon juice on the acne before sleeping. You can now go to sleep peacefully as you are sure to see pimples getting dried up by next morning.


Honey and cinnamon


Mix honey and cinnamon to make a paste and apply it over pimples before going to bed. Next morning wash your face with cold water. You may experience an itching sensation in the first few minutes as honey is sticky. You will find that the pimples are dried and dead by next morning.


Lavender oil


Although this remedy is not effective for all, it has helped many teenagers in getting rid of pimples. Apply lavender oil on pimples to dry them to a great extent. Apply lavender oil repeatedly to get rid of acne overnight.


Papaya


Extract juice from raw papaya and apply it on acne affected areas. Regular application of juice helps in eliminating pimples.


Potato


Grate a potato and extract its juice. Apply it on pimples in circular motion and let it stay for 5 minutes. Later, rinse with water. This is yet another simple remedy for pimples.


Fenugreek


Make a paste with fenugreek leaves and apply it on the face before going to bed. Let it stay for 10 – 15 minutes and rinse with warm water. This home remedy  not only removes but also prevents the formation of wrinkles, blackheads and pimples.


Garlic


Crush a garlic clove and apply it around the pimples. This cures pimples without leaving any scars.


Egg white


Egg white is another best natural cure for pimples. Dab egg white on pimples and leave it for 20 minutes. Rinse with warm water. Repeat this procedure for a few days to get rid of pimples.


Aloe Vera


Aloe vera is a natural plant extract which is known to be good for removing pimples. Apply aloe gel on pimples and leave it for 10 – 15 minutes. Rinse with water. This is the best home remedy for pimples.

These are a few home remedies to get rid of pimples overnight. These do not have any adverse effect on your skin but some may not be effective on your skin. Follow a remedy for a few weeks and if you do not find any improvement, consult a dermatologist for further assistance.

Home Remedies for Styes

November 10, 2017 0 Comments


A sty is an acute infection or inflammation of the secretory glands of the eyelids. A sty also may arise from an infected hair follicle at the base of an eyelash. It is sometimes referred to as a pigpen or "pig parlor." Pigsties are generally fenced areas of bare dirt and/or mud.

It is caused by bacteria that normally live peacefully on the eyelid skin surface. It is a red, painful lump on the edge or inside of your eyelid that may look like a boil or a pimple. 


One of the most common reasons that Staphysagria is used is the ailments from suppressing anger. Anger is not well tolerated in the modern world. Initially, the anger may be suppressed, so much so that the person actually feels as if they are not an angry person.at all. This is all too common in children.


A sty usually starts as a sensitive, red, swollen area on the edge of the eyelid at the base of an eyelash. An internal hordeolum has the same symptoms as a stye, but it grows deeper inside the eyelid.A chalazion grows more slowly, deeper inside the eyelid than a stye. Though it usually does not cause pain, a chalazion may last for several months. It may form a firm lump under the skin of the eyelid, and the inflammation and swelling may spread to the area surrounding the eye.


Here it is in three simple steps


  • Place a teaspoon of bicarbonate of soda into a cup and add a small of amount boiling water. Stir thoroughly.

  • Take a clean flannel and allow to soak up some of the liquid. As hot as you can stand it place the flannel on the stye.

  • Repeat this process 5 or 6 times.


The hot compress will definitely help the infection. Apply as much warmth as you can bear and then get down to some warm loving with a soft and clean piece of cloth. Do this as often as you can throughout the day.

Tenderness, pain, and redness are the first signs of a stye manifesting. Itching, swelling, watering of the eye, sensitivity to light, and discomfort while blinking will soon follow, and then a yellowish bump will become visible in most prominent cases. It can occur to any area on the eye.


In some cases rosacea can cause irritation to the eyes. Symptoms can include stinging or itchy eyes or eye lid problems such as cysts and styes.


I DARE You to Drink This for 3 Days, and Let Me Know What Happens toScale

November 10, 2017 0 Comments
This dare challenge is for all those who think that they cannot lose weight by drinking cleansing water having all natural ingredients. The dare is very simple and straight forward. You drink this for 3 days 3 times a day and then get on the scale and let me know what happened to the scale. This drink will help you lose weight and detoxify your body.  Are you up for this dare?

The 3 day 3 times a day dare challenge recipe is following.

Apple Cider Vinegar, Lemon and Cayenne  Cleanse Recipe

Read More: Get Keto Diet Recipe and 28 Days Keto Diet Challange To Lose Weight Fast

Ingredients:

  • 1000 ml of water

  • 1-2 tsp apple cider vinegar

  • 1/4 tsp cayenne pepper

  • 1-2 drops of lemon oil (therapeutic grade)

  • 1-2 tbs maple syrup (This is optional but I suggest you use it)


Preparation:


Preparation is simple as you have to mix all the ingredients and that is it. If you use lukewarm/hot water, it is even better but you can use water at room temperature as well.

You should consume one glass of this drink before meal three times a day. Continue drinking it for thee days.

If you do not have lemon essential oil, then you can substitute it with the freshly squeezed lemon juice. Use lemon juice of half of a lemon. However, lemon essential oil is less acidic and is gentle on your teeth.

Another alternate can be grapefruit essential oil.  Some people cannot handle the apple cider vinegar. In that case try using less quantity first day and then increase it over the period of 3 days.

Why it work?


Apple cider vinegar will suppress your appetite as it contains a compound called pectin which serves as an appetite suppressant. You will fell satisfied and full for longer time. You will consume less food which will also digest quickly.

Lemon essential oil or lemon juice as well as cayenne will also help your body to flush the toxins and suppress your appetite..

Before accepting this dare, you should note your weight as well as consult your physician. It is not for everyone!

Read More: Get Keto Diet Recipe and 28 Days Keto Diet Challange To Lose Weight Fast


I DARE You to Drink This for 3 Days, and Let Me Know What Happens to Scale - #fitness #fat #health #drink #diy #try #weight #lose #loss #healthy #beauty #abs #butt

Tighten Your Breasts in Week with This Home Remedy

November 10, 2017 0 Comments
Today I am sharing with you the tested home remedy that will lift your breast and make them firm and perkier. An upright pair of breasts is part of many factors that constitute the eternal feminine beauty. Sagging breasts can severely undermine the beauty of a woman. Through out the adult life, every woman desires to have perfectly shaped breast. Unfortunately it is not possible in majority of cases. When woman reaches at the age of 40, the breasts starts to droop due to a number of reason.  Some of the factors that results in breast sagging include poor nutrition, pregnancy, breastfeeding, rapid weight loss,  menopause, weight gain, and aging.  In some cases wearing wrong fitted bra can also result in sagging of the breasts. Breast sagging does not just happen after the age of 40, it can also occur at the younger age.

The all natural breast tightening home made mask is made with ingredients that are readily available and can be applied to your breasts without any side effects [Please see note]. You may want to try this home made breast firming mask first before considering any other costly surgical procedure or products. It is time to make the breast mask so that you can firm your saggy breast.

This natural formula is effective and risk free and many women can benefits from this remedy. The breast mask shared here is most probably best all natural breast mask that will help you to perk  your breast naturally. It is not an instant fix but you should by seeing results after about 7 days of using this breast lifting all natural mask.

Vitamin E, Honey and Egg White Breast Tightening Mask


Ingredients:


  • Vitamin E – 1 tablespoon

  • Honey – 1 teaspoon

  • Egg White – 1


Instructions:


  • Add all the above ingredients in a bowl (one tablespoon of vitamin E, one teaspoon of honey and one egg white).

  • Make a paste by mixing all the ingredients.

  • Gently massage your breast for 3 to 5 minutes by applying this paste on your breasts.

  • Wear any bra that will not absorb the mask. The bra should be fitted to your breasts and not loose.

  • After about 30-45 minutes, you can remove the bra and wash your boobs with lukewarm water.

  • Repeat the process everyday and you should be starting to see visible results after about 7 days of use.


If you do not find the Vitamin E, you can use the liquid in the Vitamin E capsules as well.

Note: Don’t use this mask if you are allergic to any of ingredients.

Tighten Your Breasts in Week with This Home Remedy - #health #breasts #Fitness #beauty

Thursday, 9 November 2017

How To Use Baking Soda To Reduce Dark Circles And Bags Under The Eyes

November 09, 2017 0 Comments
More and more people are convinced of the benefits of sodium bicarbonate, so they got to use it frequently in everyday life, either for cooking, cleaning or as a beauty product. Especially women appreciate it as a beauty product.

The most effective face masks contain sodium bicarbonate. The recipe below helps eliminate dark circles and bags under the eyes.

Preparation method

1. Add a teaspoon of baking in a glass of hot water or tea and mix well.

2. Soak two cotton pads in this solution and place them under the eyes.
3. Leave on for 10-15 minutes, then rinse your face and apply a moisturizer.

Do this daily and you’ll see amazing results in just 2 weeks!

Best Remedies for Dark Circles:

How great would it be to treat yourself with natural ingredients? Most of these remedies are available in your kitchen. So walk towards the kitchen to feed yourself and to treat your skin. Here are some natural home remedies, which will help you get rid of saggy bags or dark circles under your eyes.

Raw Potato:

Remedy # 1:

Potato consists of natural bleaching agents, which will help to lighten the dark circles and remove the puffiness near the eyes. What you need to do is, take two chilled potatoes and extract its juice. You can cut them into pieces, blend them and sieve it. Take a cotton ball and dip it into the potato juice. Flatten the cotton balls with your fingers and place it on the dark circles. Make sure that the juice covers your the affected area. Leave it on for 15 minutes and then rinse off with cool water. You need to apply cream on this area. Continue this every day till you notice the change.

Remedy # 2:

In case you find this process of extracting juice to be time consuming, you can take thick potato slices and place them on the dark circles. and repeat the same procedure.

Remedy # 3:

You can mix equal quantities on potato and cucumber juice. Apply this juice on the dark circles and leave it on for 15 minutes. Rinse it off with normal water. Do this regularly to notice the change

Cucumber:

Remedy #1

Cucumber has skin lightening agents and acts as the best astringent. Cucumber is very quick in treating dark circles and one can rely on it completely for this purpose. It is a very good skin toner as well. Cut the cucumber into thick slices and place them in the refrigerator for 30 minutes. Remove them and place them on the affected area for at least 10 minutes. Wash it off with normal water. It will give you the best relief from dark circles. It is a common remedy used to tone the skin. This does not only remove dark circles but relaxes the eyes.

Cucumber for dark circles

Remedy # 2:

Another remedy using cucumber is, to take two equal quantities of cucumber juice and lemon juice. Pour them into a small bowl. Take a cotton ball and dip it into the juice mixture. Place these on the dark circles and leave it on for 15 minutes. Wash it off with normal water and repeat this everyday for a week. You will see the dark circles and puffiness of the eyes vanish!

Remedy # 3:

Take a small bowl with cucumber juice, and dip two cotton pads into it. Place these on the eyes and leave it on for 15 minutes, wash it off with plain water. You can also directly apply the juice on the dark circles. Repeat every day until you see results.

Mint Leaves:

Remedy # 1:mint mask for dark circles

Along with reducing dark circles, mint leaves give a cooling effect to the eyes. This is a natural remedy that will soothe and refresh your eyes. Take five to six mint leaves and crush them. Apply these leaves around the eyes and leave it on for 10 minutes. Wipe it off with a cold cloth. You need to be very gentle, as you are contacting a very sensitive area. This is the most effective natural remedy to cure under eye dark circles.

Remedy # 2:

Another remedy to cure dark circles is by adding mint leaves paste to tomato juice. You need to apply this paste on the dark circles and leave it on for 5 to 7 minutes. Rinse off this area with cold water.

How To Use Baking Soda To Reduce Dark Circles And Bags Under The Eyes -  #eye #dark #beauty #hair #health #fitness

Wednesday, 8 November 2017

DIY RICE WATER TONER

November 08, 2017 0 Comments
If you’ve never washed your face with rice water, you’ve been missing out! This DIY rice water toner uses only rice and water as its ingredients and will cleanse, tone, and purify the skin. Rice water has been used for thousands of years by the Japanese, and that’s what they credit to their youthful, perfect complexion. Rice water contains beneficial skin properties such as Vitamins B1, C, E, and minerals. These vitamins and minerals will cure acne, dark spots and scars, tighten and shrink pores, and prevent and erase wrinkles, fine lines, and crow’s feet.

What we really love about ths DIY rice water toner is that it’s SO easy to make and will actually leave your skin extremely soft and clean after just the first use. All you need is some rice and some water and you’re ready to make your rice water toner!

Rice Water Toner Recipe


You’ll Need:


  • 1/2 cup rice (any kind will work, but we prefer either Jasmine or white rice)

  • water


Directions:


  1. In a colander, rinse your rice to remove any dirt or debris.

  2. Then, place your rinsed rice into a pot and cover with water.

  3. Let the rice sit in the water for about 15 minutes. During this time, all the vitamins and minerals from the rice will seep into the water.

  4. After the 15 minutes have elapsed, drain the rice, catching all the water into a bowl or jar. Save your rice for cooking!


How to Use The Rice Water


You can use the rice water in a couple of different ways:

  1. As a cleansing water: Splash the rice water on your face before or after cleansing with a mild cleanser. Use the rice water instead of regular water to infuse the skin with all the amazing vitamins and minerals.

  2. As a toner: Dab a little bit of the rice water onto a cotton pad and rub all over face and neck. You can do this in the morning and before bed.


Immediately after you’ve toned or washed with the rice water, your skin will tighten, look brighter, and feel amazingly soft. If you suffer from acne, the rice water will also work miracles – just keep using it daily until you start to see a difference, but this stuff works fast!

You can keep the rice water in the fridge in an airtight container for up to 5 days. After 5 days, you must discard any leftover rice water. Once you’ve run out, make your rice water again! It takes 15 minutes, it’s extremely cheap, and very effective!

DIY RICE WATER TONER #beauty #diy #toner #rice #hair

Guaranteed! Whiten Your Yellow Teeth In Less Than 2 Minutes!

November 08, 2017 0 Comments
Coconut oil is one of the most versatile components. It may be used for a wide range of uses & functions. What’s more, coconut oil may be used as a base for a toothpaste. Hence, you could use coconut oil in a mixture with other substances to make the most powerful toothpaste. The commercial toothpaste contains chemical substances which might be harmful to the teeth. On the other hand, the toothpaste we will present you today is an all-natural one. Moreover, it is secure, healthy, and effective in whitening the teeth.

Coconut oil doesn’t incorporate any foaming agents and consequently, protects your mouth from canker sores. Furthermore, coconut oil is full of anti-bacterial properties, which dispose of the bad bacteria in your mouth. Additionally, it provides the subsequent advantages for the oral health:

  • Reduces inflammation;

  • Whitens teeth;

  • Soothes throat dryness;

  • Prevents cavities;

  • Heals cracked lips;

  • Improves immune system;

  • Strengthens gums and jaw;

  • Cures tooth decay;

  • Eliminate bad breath;

  • Heals bleeding gums;


COCONUT OIL TOOTHPASTE


YOU ARE GOING TO NEED THE FOLLOWING INGREDIENTS:


  • 2-3 tablespoons of baking soda

  • 15-20 drops of essential oils (optional)

  • 2 small packets of stevia (optional)

  • about ½ cup coconut oil


INSTRUCTIONS:


What’s more, coconut oil toothpaste is cheaper and it is able to be very without problems prepared. Here’s a way to put together it in the convenience of your residence:

First, take a jar and put the semi-hard coconut oil and put all the other components. Then, blend well the use of a fork. You ought to dip your toothbrush in and scrape a small amount onto bristles. Brush your teeth as you would usually do. Moreover, you may additionally try oil pulling using coconut oil.

Guaranteed! Whiten Your Yellow Teeth In Less Than 2 Minutes! #teeth #yellow #Baking #soda #coconut #oil #white

Tuesday, 7 November 2017

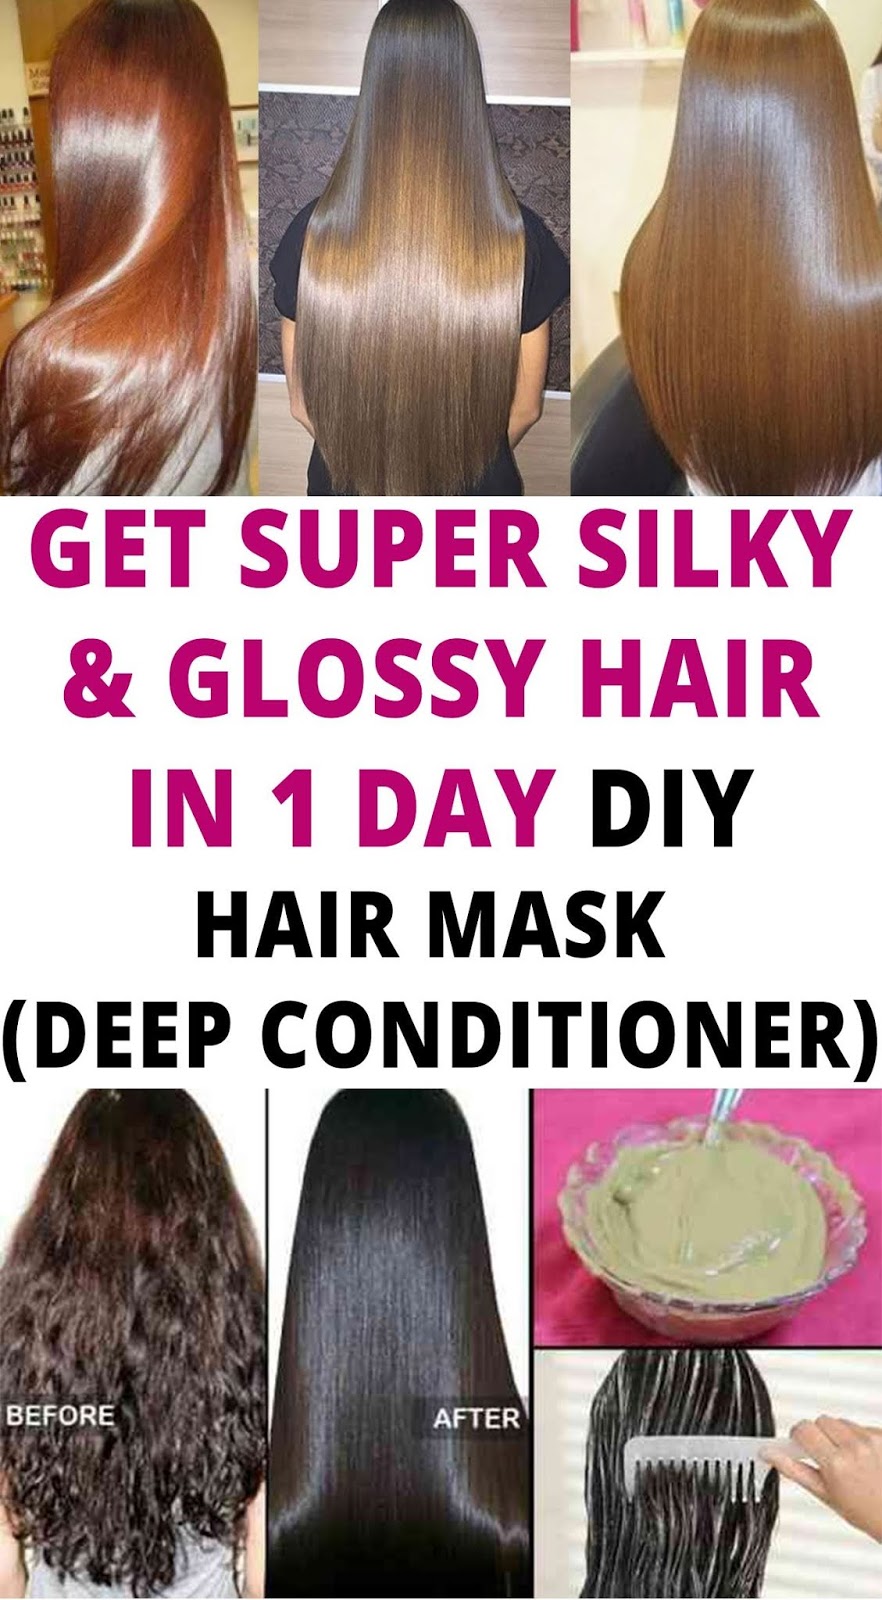
GET SUPER SILKY & GLOSSY HAIR IN 1 DAY | DIY HAIR MASK – DEEPCONDITIONER

November 07, 2017 1 Comments
How To Make Your Hair Silky, Long, And Soft

1. Aloe Vera

You Will Need

Aloe Vera Leaf
2 tbsp Water
Spray Bottle

Prep Time

5 minutes
Treatment Time

5 minutes
Method

-Slice an aloe vera leaf and extract two tablespoons of gel using a spoon. Ensure that you’re only extracting the clear gel and not the yellow.
-Blend this gel until it gets to a smooth consistency.
-Add two tablespoons of water to the gel and mix well.
-Pour this liquid into a spray bottle and shake well.
-Spray your hair with the aloe vera solution after it has been washed and dried.
-Leave it on like you would hair spray.

How Often?

3-4 times a week.

Why This Works

Aloe vera is an abundant source of proteolytic enzymes which repair the damaged cells present in your scalp. This allows it to improve follicle health and boost hair growth. The moisture content of this ingredient helps hydrate your hair and keep it conditioned throughout the day. This will ensure a smooth texture with minimized frizz.

2. Hot Oil Massage With Coconut Oil/Olive Oil

You Will Need

2-3 tbsp Coconut Oil/Olive Oil
Hot Towel

Prep Time

5 minutes
Treatment Time

45 minutes
Method

-Take 2-3 tablespoons (depending on the length of your hair) of your chosen oil and heat it for a couple of seconds until it is slightly warm.
-Massage the warm oil into your scalp and work it through the length of your hair.
-Massage your scalp for about 15 minutes and then leave the oil on for an additional 30 minutes.
-Cover your hair with a hot towel while you wait.
-Wash your hair with a mild sulfate-free shampoo and finish with conditioner.

How Often?

Twice a week.

Why This Works

A hot oil massage can help stimulate your hair follicles, boosting hair growth. It is an efficient deep conditioning treatment for your hair which also fights issues such as dandruff and itching. Coconut oil helps nourish your strands with its rich triglyceride content. It also has the ability to penetrate deep into your hair shafts, allowing for optimum nourishment. Olive Oil is packed with antioxidants, fatty acids, and vitamin E, which help condition your hair while preventing and repairing hair damage.

3. Curd

1 cup Curd
2 tbsp Amla Powder

Prep Time

2 minutes
Treatment Time

30 minutes
Method

-Combine the two ingredients until you get a smooth mixture.
-Apply these ingredients onto your scalp and hair.
-Once your hair is completely covered, leave the mask on for about 30 minutes.
-Wash your hair with a mild sulfate-free shampoo.
-Finish with conditioner.

Read More: Get Keto Diet Recipe and 28 Days Keto Diet Challange To Lose Weight Fast

How Often?

1-2 times a week.

Why This Works

Curd contains vitamins B5 and D which are essential for hair health. It helps strengthen your hair shafts from within while also fighting off issues such as dandruff. The amla in this mask helps give your scalp a vitamin C boost, aiding hair growth.

4. Eggs

You Will Need

1 whole Egg
1 tbsp Olive Oil
1 tbsp Honey
Shower Cap

Prep Time

2 minutes
Treatment Time

30 minutes
Method

-Whisk the ingredients together to get a well-combined mixture.
-Apply this mask onto your scalp and your hair.
-Once your scalp and hair are completely covered, wait for 30 minutes.
-Cover your hair with a shower cap while you wait to avoid a mess.
-Wash your hair with cool water and a mild sulfate-free shampoo.
-Finish with conditioner.

How Often?

1-2 times a week.

Read More: Get Keto Diet Recipe and 28 Days Keto Diet Challange To Lose Weight Fast

Why This Works

Eggs are one of the most abundant protein sources. It helps provide your hair with nourishment and shine while also improving its texture. It helps repair hair damage and adds life to dull hair. Regularly using this hair mask will help strengthen and condition your hair while making it more manageable.

GET SUPER SILKY & GLOSSY HAIR IN 1 DAY | DIY HAIR MASK – DEEP CONDITIONER #hair #beauty #style #mask Silkey

WOMEN ARE GOING CRAZY FOR THIS CREAM AS IT MAKES YOU LOOK 10 YEARSYOUNGER IN JUST 4 DAYS

November 07, 2017 0 Comments
In today’s article we will offer you an amazing cream that will help you to get glowing skin and restore your youth. It will make your skin spotless and you will look 10 years younger in only 4 days!

Here’s how to prepare this incredible formula:

Ingredients

  • 1 cup of water

  • 1 tablespoon of milk

  • 1 tablespoon of honey

  • 3 tablespoons of boiled rice

Read More: Get Keto Diet Recipe and 28 Days Keto Diet Challange To Lose Weight Fast
Preparation

Boil the rice in water first, then drain it and mash it with the honey and milk. Now, stir well to mix everything and your facial mask is ready. Before applying it on your face, wash it with water well and apply a thin layer of the cream. Leave it to work for 15-20 minutes, then rinse with lukewarm water and pat your face dry. Repeat the process every day for a few weeks and your wrinkles and dark spots will disappear!

Read More: Get Keto Diet Recipe and 28 Days Keto Diet Challange To Lose Weight Fast

DIY Homemade Skin Tightening and Firming Mask | Natural FaceLift Mask

November 07, 2017 0 Comments
You may want your face to look dazzling, young and tight, but don’t want surgery or find expensive treatments out of the question

Here’s a quick way to get a facelift in a minute in three easy steps. Your skin will look firmer, toner and younger, but it won’t take a fortune to do it.

Using three ingredients most people already have in their house, you can get a smooth younger looking skin in just 20 minutes. It just costs pennies to make and best of all, since you probably already have the three ingredients, you can test it out first, without buying anything. If you have an allergy to eggs, avoid this one and look for a different facial.

Why These Ingredients
The first of the three ingredients is egg white. Egg white has been used for centuries in beauty products. Egg white acts like an astringent, tightening and shrinking pores, while also tightening the skin in the process.

The essential nutrients can help reverse sagging skin, while also reducing oil. It not only lifts out blackheads, but it also helps remove facial hair and smooth wrinkles. The good news is that you can use the yolk left over for a fantastic hair treatment.

Lemons or limes are often used in homemade beauty treatments, for a good reason. They both have fabulous beauty powers. They both contain exfoliates known as AHAs—alpha hydroxy acid, a well known exfoliate often found in commercial beauty products. They can help fight oily skin and have antibacterial and anti-oxidant properties.

The last on the list is magical raw honey. Honey is an antimicrobial and antibacterial property. It’s also a great natural moisturizer, especially as it contains not only natural emollients that retain skin moisture, but also humectants that attract moisture.

It contains natural proteins, vitamins, enzymes and other nutritional components. It also helps regulate the pH of the skin. Best of all it’s an antioxidant to help keep your skin cells protected. When you put the three together, you have a dynamic facial that will have you looking years younger in just twenty minutes.


The Instant Face Lift Mask:

  • 1 egg white (tightens, lifts, and firms)

  • 1 lemon or lime wedge, squeezed (brightens, balances)

  • 1 tsp of raw honey (moisturizes, hydrates)


Directions:
① In a little bowl, separate the egg yolk from white.

② Add 1 tsp of raw honey

③ Squeeze the lemon or lime wedge
 ④ Whisk the ingredients together until it becomes a whipped, foamy broth.


How to Apply:
① With your fingertips or a makeup brush, use as much as necessary to spread evenly to a cleansed face and neck, completely avoiding the lips and around the eyes.

② Leave on for 20 minutes, or until it dries completely. You may feel a tingling sensation, and the mask may begin to feel extremely tight.

③ Once dried, use your hands to splash off the mask with cold water, as the cold will seal the newly tightened pores.

④ Follow with a light, oil-free moisturizer such as Neutrogena Oil-Free Sensitive Skin.

⑤ Store the leftover in the fridge and use it within 2 days.

DIY Homemade Skin Tightening and Firming Mask | Natural FaceLift Mask - #beauty #diy #skin #care #best #face #mask

Monday, 6 November 2017

HOW TO REMOVE STRETCH MARKS WITH SUGAR

November 06, 2017 0 Comments
Stretch marks are unsightly and are very difficult to remove. See how to get rid of them using natural ingredients.
 Stretch marks can affect anyone and usually occur after pregnancy, because of weight fluctuations or steroid-based drugs. Women have a higher risk of making stretch marks and their removal is very difficult. Besides commercial creams, you can try a natural recipe which is prepared in minutes.


Preparation method

For this natural remedy, you need 1 spoonful of sugar, 1 teaspoon of olive oil or castor oil, lemon juice and half a capsule of vitamin E. Mix all ingredients until you get a smooth paste, then apply it an area affected by stretch marks using circular movements.

Rub gently until the substance is absorbed. For an effective treatment, it’s advisable using a massage brush to increase blood circulation.
Try this treatment 2-3 minutes daily for several weeks and you’ll see how stretch marks will fade.

HOW TO REMOVE STRETCH MARKS WITH SUGAR #SUGAR #MARKS #STRETCH #SKIN

DIY Blackhead Removal

November 06, 2017 0 Comments
DIY Blackhead Scrub
An insanely easy tip to remove those nasty looking black heads. So simple all you need is 3 items you can probably find in your kitchen.

You’ll Need:

1/2 tbsp Honey
2 tsp. Lemon Juice
2 tsp. Baking Soda

Mix ingredients together until pasty. Rinse face before applying and use a cotton swab to apply mixture to affected areas.
After 2-5 minutes, rinse with cool water, pat dry with a soft towel and apply moisturizer.


Get Rid of Blackheads in 10 Minutes

November 06, 2017 0 Comments
Blackheads, especially the ones that appear on your nose are one of the most unaesthetic skin problems.
You have two options if you want to get rid of them: see a beautician or make your one nose strips.
I prefer the second one and I will show you how simple it is to get rid of blackheads at home with only 2 ingredients. As I said you only need two ingredients:
  • 1 tablespoon milk;
  • 1 tablespoon gelatin powder.
You will use the microwave to prepare the strip so be sure the recipient you will use is heat resistant.
After you choose the appropriate recipient/bowl, pour the milk in it. Then add the gelatin and mix well until you obtain a coarse mixture.
Put the recipient in the microwave for 10 seconds on a medium power.
Let it to cool a little then apply it on your nose by using a make-up brush you do not use anymore.
After 10 minutes take it off from your nose and look at the nose strip: you will see the blackheads and impurities that were on your face less than 10 minutes ago.

10 WEEK NO-GYM HOME WORKOUT PLAN

November 06, 2017 0 Comments
If you’ve decided to lose weight, this workout plan can be of great help. Along with working out, you will also need to eat a healthy diet and drink sufficient amounts of water so that the workout can yield positive results. You should workout from 45 to 60 minutes every day. Below, you have the workout plan presented in detail:

Monday
20 squats
25 second wall sit
15 second plank
10 butt-kicks
10 sit-ups
35 jumping jacks
25 crunches
 
Tuesday
10 squats
10 push-ups
30 second plank
20 butt-kicks
45 second wall-sit
10 jumping jacks
 
Wednesday
45 second plank
35 second wall-sit
50 jumping jacks
15 squats
20 push-ups
25 butt-kicks
30 crunches
 
Thursday
30 second plank
60 second wall-sit
20 push-ups
35 butt-kicks
20 crunches
35 squats
 
Friday
25 squats
60 second plank
30 push-ups
30 crunches
55 jumping jacks
50 second wall-sit
5 butt-kicks
45 sit-ups
NOTE: Make a pause from the workout during the weekend.
This is the weekly plan for cardio workout:
  1. 30 -seconds sprint, 30 -seconds jog (5x)
  2. 35- seconds sprint, 45-seconds jog (6x)
  3. 45-seconds sprint, 60-seconds jog (7x)
  4. 50-seconds sprint, 45-seconds jog (8x)
  5. 55-seconds sprint, 30-seconds jog (7x)
  6. 60-seconds sprint, 50-seconds jog (6x)
  7. 65-seconds sprint, 45-seconds jog(7x)
  8. 70-seconds sprint, 50- seconds jog (8x)
  9. 75-seconds sprint, 40 seconds jog ( 7x)
  10. 80-seconds sprint, 30 seconds jog (8x)

Rub This On Any Scar, Wrinkle Or Stain You Have On Your Skin And Watch Them Disappear In Minutes! Even Doctors Are Shocked!

November 06, 2017 1 Comments
The main ingredient of this incredible solution is honey, a sweet natural nectar produced by bees which will promote flow in your skin and improve your skin besides the various other health advantages that can improve your general health. However, instead of these items, you must understand that you can enhance the quality of your skin with an easy natural mix that can eliminate wrinkles, stains and scars from your face.

The following recipe will surely eliminate stains, freckles, and scars from your face.
What Ingredients You Will Need:
1 tablespoon of organic honey
1 tablespoon of lemon juice
1 tablespoon of ground nutmeg
1 tablespoon of powdered cinnamon

Read More: Get Keto Diet Recipe and 28 Days Keto Diet Challange To Lose Weight Fast
How To Prepare It:
Make a thick paste from all the ingredients, and feel free to add more honey if your skin is more sensitive as honey can alleviate skin inflammation. However, don’t use it if you have rosacea since it can cause vasodilation – widening of blood vessels. If the mask becomes too thick, you can add green or white clay, and some water.
Make sure you wash your face well with water and soap. Afterwards, we recommend using your favorite moisturizer. Apply the mask on the affected areas and don’t be afraid if you feel a tingle – this means that the mask is already working.

Read More: Get Keto Diet Recipe and 28 Days Keto Diet Challange To Lose Weight Fast

Apply This Homemade Mask On Your Hair and Wait For 15 Minutes. The Effects Will Leave You Breathless!

November 06, 2017 0 Comments

In this article today we’re offering you a natural solution that will make your hair beautiful and strong in a very fast time. This is a homemade remedy and itwill help you restore all the lost nutrients, but it will also strengthen your roots! At this point,you’ll avoid hair loss and your hair will return the shine it has lost!
The hair mask that everyone is talking about
The main ingredients of this mask are honey and cinnamon. Both of themoffer great benefits for the hair and also for the scalp. We may all have them at our kitchens, but if we don’t, they’re not expensive at all. You can use this mask on any type of hair (greasy, dry, smooth, wavy). You’ll notice that the mask acts quickly and the results are inevitable!


Preparation:

Add 1/2 a cup of olive oil in a small pan and put it on fire. When the oil becomessufficiently warm, remove it from the fire and put it in a bowl immediately.
Then, add 1 teaspoon of cinnamon and 1 teaspoon of honey. Mix everything well using a spoon, until you get a homogenous mixture.
Use:
You should apply this mixture on your scalp, with a brush as an applicator. Theprocess should go like this:
first, divide the hair with a comb and start applying from the back part up to the front part. Leave it to act for 15 minutes. Wash your hair with a soft shampoo and apply a conditioner like you usually do.
Use the mask every day for one week. The great difference will appear very fast and your hair will be healthier and shinier than ever!


The Beauty Secret Cosmetic Brands Don’t Want You To Know About

November 06, 2017 0 Comments
In the past, I was a HUGE sucker for beauty products. Anything that promised to make my skin softer, minimize wrinkles, erase signs of aging, make my pores smaller, or turn me into Christy Brinkley over night– I HAD TO HAVE IT!
BUT, I’ve recently noticed that I have several drawers full of products that I’ve used a handful of times but haven’t touched since. I’m always disappointed. I mean, really, is there magic to any of these products, or are we just throwing our money down the drain in our search for “perfection”? The thing is, marketing works, and we are suckers for it.

OK, HERE’S THE SECRET!! It’s simple and inexpensive. Are you ready for it?
Exfoliate your face with baking soda up to 3 times a week (mixed with just enough water to make a paste), followed by a baby wash to rinse it off (I do this in the morning to prep my skin for makeup). Use baby wash once again at the end of the day to thoroughly clean off your makeup. You can also exfoliate with a wash cloth on alternating days if you have dry, flaky skin like me.
That’s all I’m trying to say is, stop over washing your face with harsh chemicals! It causes a mess of unwanted skin conditions.
AND HERE IS WHY:
In our never-ending pursuit of beauty, we tend to overwhelm our skin with chemicals, parabens, synthetic dyes, fragrance, formaldehyde, and many other unnatural ingredients. The truth is, simplifying your beauty routine can actually bring out the best in your skin.
I have a friend that’s been an esthetician for over a decade now, and I noticed on a trip with her many years ago that she used baby shampoo to wash her face every day. I thought it was odd, especially considering that she had access to all of the latest beauty products a girl could possibly dream of. I, of course, visited the baby isle for the first time in years to pick up a bottle as soon as I got home, and it has literally changed my life.
The only thing I was missing was a good exfoliant, and after some research, discovered that baking soda was excellent for this (and super cheap!). The powder is really fine, and because of this, I think it does a much better job at getting rid of dull, flaky skin than the leading exfoliant products.
Anytime you can go as close to natural as possible, you will find the results are well worth the time and effort. This includes anything and everything that you put on your body (soap, lotion, cream, shampoo, deodorant, makeup remover, etc.). Unfortunately, most of us don’t start running towards the natural, less-harsh products until we start having side effects. Kind of like faithfully applying sunscreen every day AFTER you start noticing sun damage.
In fact, even acne-prone skin responds better to natural products. Believe it or not, your body instinctively produces an abundance of oil if it’s robbed of its natural oils (from harsh cleansers), causing a havoc of pimples and black heads.
HERE IS A LIST OF OTHER NATURAL PRODUCTS THAT I’VE DISCOVERED AND CAN’T LIVE WIHOUT:
  • Rose Hip Oil is better than ANY other moisturizer I’ve ever tried. It will make you glow! It goes on silky smooth and absorbs quickly so it won’t leave you with a greasy face. I apply it in the morning to my face, neck and chest. I also use coconut oil for my body, and it smells amazing!
  • I also use Peppermint Castile Soap  in my bath a few times a week to soothe my dry, itchy skin (especially in the winter months). It’s liquid and can be used for many other purposes, too. In fact, it’s so gentle, it can be used to wash produce.
  • Neem Oil is amazing for your skin and hair. I apply it to dry patches of skin or eczema, and once in a while to the ends of my hair before washing. It has a strong earthy odor, but I don’t even notice the smell anymore. According the the reviews, it’s also great for acne.

Sunday, 5 November 2017

9 Surprising Uses for Vicks VapoRub

November 05, 2017 0 Comments
We all know what is Vicks VapoRub. But for those who never heard of it, it is a mentholated topical cream which can be used for the chest, back and throat if you have cough inhibition, or for minor aches in your muscles and joints or for pains that are present for longer period of time.\

This is the most used cream, and it can be used in a lot of different ways.
We will represent you 10 amazing ways to use Vicks VapoRub:

Treats Eczema
If you suffer from this condition, apply Vicks on the affected area and stop the inflammation and itching that you have and feel.

Reduces the muscle pain
Take Vicks VapoRub and massage the muscles and then cover them with a warm towel. Try to relax until the pain vanishes. If you want to have better results, then repeat the procedure three times a day.

Skin moisturizer
If you have dry skin, a little bit of Vicks VapoRub can make miracles. Just put it on your skin and the results will be inevitable.

Acne treatment
 Put the cream on the affected areas on your skin. It will dry the acne and other skin problems, and release you from the skin ignition.

Release from the chest obstruction and cough
This is the reason of the Vicks popularity. You can treat the chest obstruction and cough from the cold with it.

Keeps your cat away from scratching
Put the Vicks everywhere in your home, so you can protect the furniture to be screeched by your cat.

Stretch marks
Put the cream on your stretch marks every day, and after 2 weeks you will have stunning results. You will lower their appearance.

Stop your pet to pee inside
In different places from your home, put an open can with Vicks and you will stop your pet to pee inside.

Sinus headaches
If you want to get rid of the sinus headache, just put the cream under the nose. Inhale deeply, and release from the headache, because of the menthol in the cream which can relax you and to calm down the headache.